安装 tensorflow GPU(使用 conda)
本文最后更新于 2026年1月20日 晚上
环境:windows 11
1. 快速开始
运行以下命令,直接新建一个包含 tensorflow (gpu) 以及其他常用库的新环境。
1 | |
2. 「方法一」半自动安装
- 先安装 cudnn 和 cudatoolkit 包,再安装 tensorflow 包
1 | |
3. 「方法二」全自动安装
- 缺点是版本相对 pypi 稍低
- 如:目前 pypi 版本为 2.8,conda 的版本为 2.6
conda install tensorflow-gpu和pip install tensorflow-gpu安装的内容是不同的
1 | |
4. 验证
1 | |
5. 提示
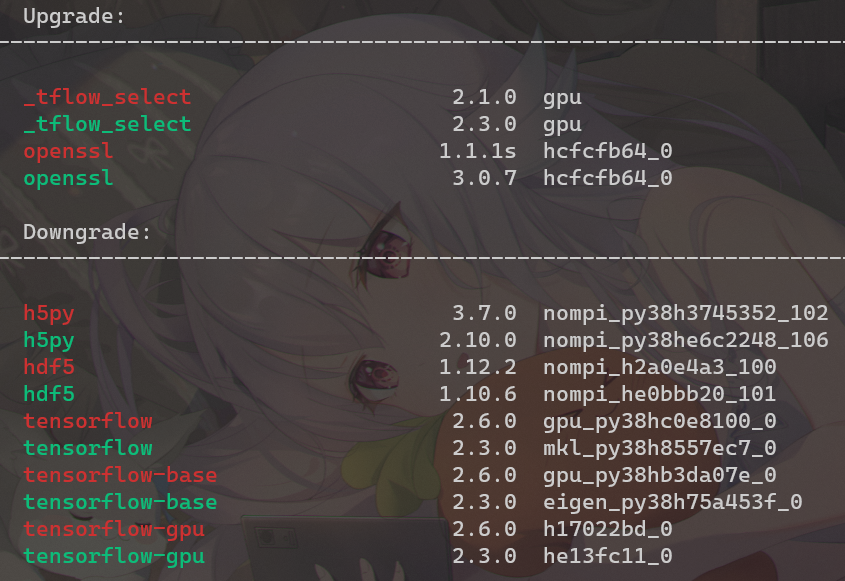
在后期修改环境的时候,留意不要把 tensorflow-gpu 从 gpu 版本换成 cpu 版本,如下图所示:
6. 附
「参考」TensorFlow — Anaconda documentation: https://docs.anaconda.com/anaconda/user-guide/tasks/tensorflow/
「扩展」Anaconda | TensorFlow in Anaconda: https://www.anaconda.com/blog/tensorflow-in-anaconda
不太清楚
conda install -c nvidia cuda命令的作用,因为网络问题,一直没有成功过(也没有找到合适的镜像源)
安装 tensorflow GPU(使用 conda)
https://blog.cc01cc.cn/2022/12/06/use-conda-tensorflow/